Build a User Management App with Swift and SwiftUI
This tutorial demonstrates how to build a basic user management app. The app authenticates and identifies the user, stores their profile information in the database, and allows the user to log in, update their profile details, and upload a profile photo. The app uses:
- Supabase Database - a Postgres database for storing your user data and Row Level Security so data is protected and users can only access their own information.
- Supabase Auth - users log in through magic links sent to their email (without having to set up passwords).
- Supabase Storage - users can upload a profile photo.
If you get stuck while working through this guide, refer to the full example on GitHub.
Project setup
Before we start building we're going to set up our Database and API. This is as simple as starting a new Project in Supabase and then creating a "schema" inside the database.
Create a project
- Create a new project in the Supabase Dashboard.
- Enter your project details.
- Wait for the new database to launch.
Set up the database schema
Now we are going to set up the database schema. We can use the "User Management Starter" quickstart in the SQL Editor, or you can just copy/paste the SQL from below and run it yourself.
Get the API Keys
Now that you've created some database tables, you are ready to insert data using the auto-generated API.
We just need to get the Project URL and anon key from the API settings.
- Go to the API Settings page in the Dashboard.
- Find your Project
URL,anon, andservice_rolekeys on this page.
Building the app
Let's start building the SwiftUI app from scratch.
Create a SwiftUI app in Xcode
Open Xcode and create a new SwiftUI project.
Add the supabase-swift dependency.
Add the https://github.com/supabase/supabase-swift package to your app. For instructions, see the Apple tutorial on adding package dependencies.
Create a helper file to initialize the Supabase client.
You need the API URL and the anon key that you copied earlier.
These variables will be exposed on the application, and that's completely fine since you have
Row Level Security enabled on your database.
Set up a login view
Set up a SwiftUI view to manage logins and sign ups. Users should be able to sign in using a magic link.
The example uses a custom redirectTo URL. For this to work, add a custom redirect URL to Supabase and a custom URL scheme to your SwiftUI application. Follow the guide on implementing deep link handling.
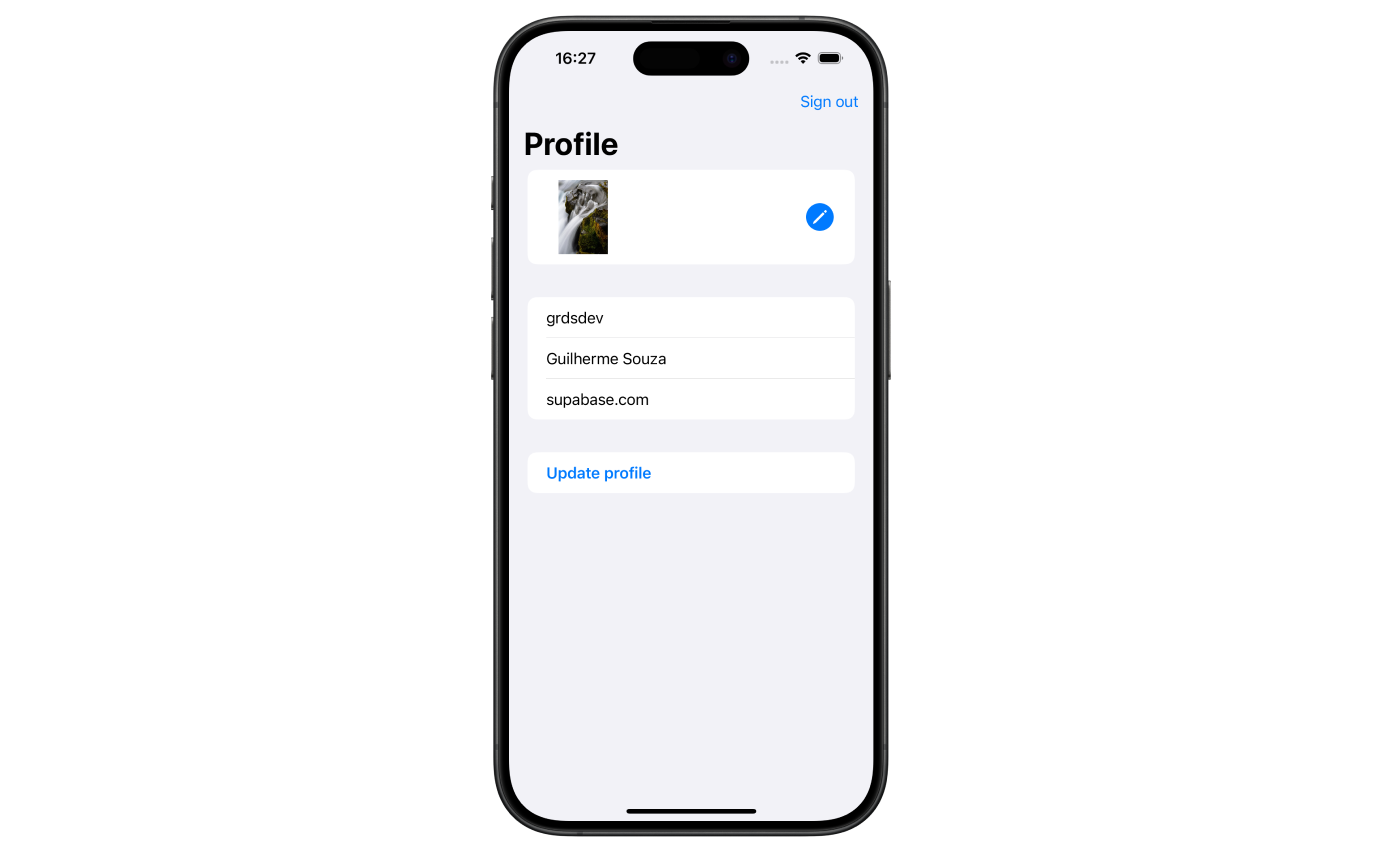
Account view
After a user is signed in, you can allow them to edit their profile details and manage their account.
Create a new view for that called ProfileView.swift.
Models
In ProfileView.swift, you used 2 model types for deserializing the response and serializing the request to Supabase. Add those in a new Models.swift file.
Launch!
Now that you've created all the views, add an entry point for the application. This will verify if the user has a valid session and route them to the authenticated or non-authenticated state.
Add a new AppView.swift file.
Update the entry point to the newly created AppView. Run in Xcode to launch your application in the simulator.
Bonus: Profile photos
Every Supabase project is configured with Storage for managing large files like photos and videos.
Add PhotosPicker
Let's add support for the user to pick an image from the library and upload it. Start by creating a new type to hold the picked avatar image:
Add PhotosPicker to profile page
Finally, update your Models.
You no longer need the UpdateProfileParams struct, as you can now reuse the Profile struct for both request and response calls.
At this stage you have a fully functional application!